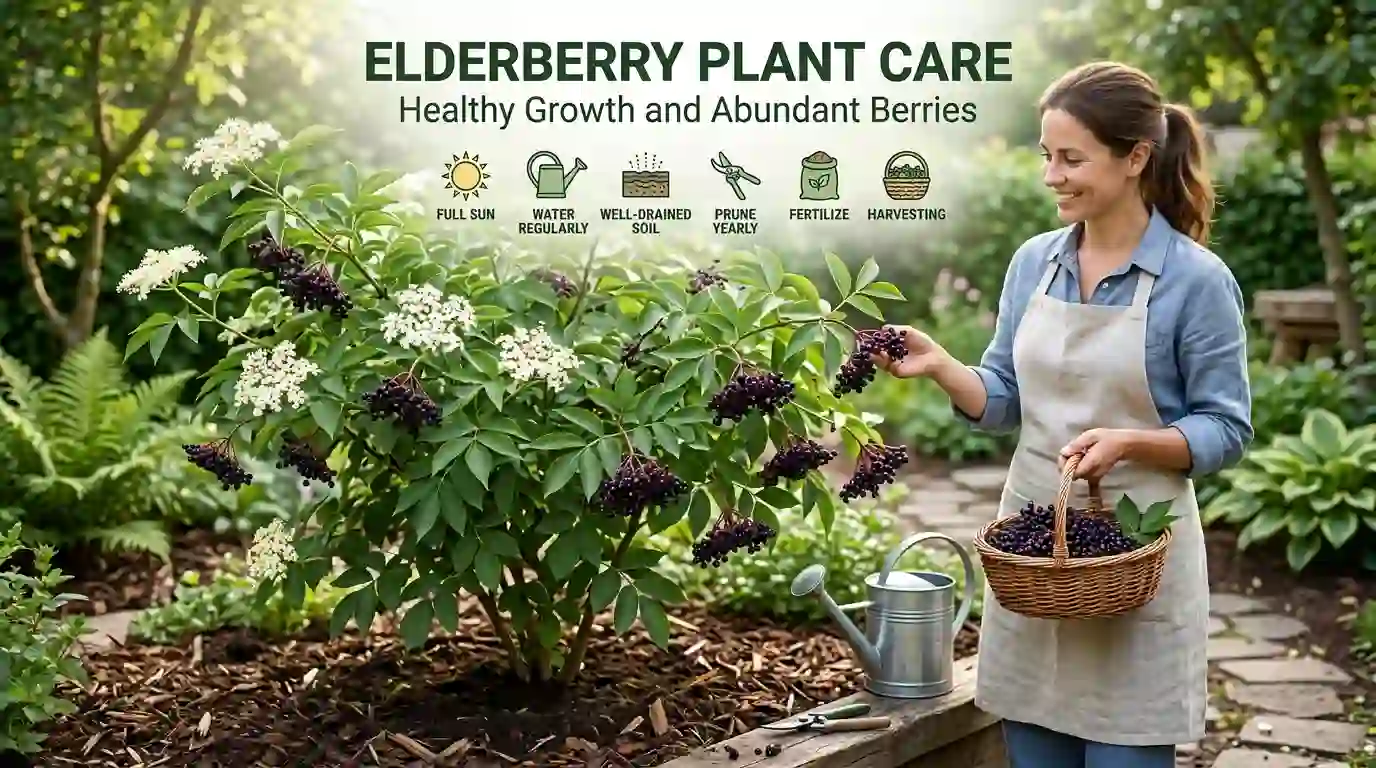
Elderberry plants are attractive, fast-growing shrubs known for their clusters of small flowers, dark berries, and wildlife-friendly foliage. Gardeners grow them for fruit, ornamental value, and their ability to fill larger garden spaces.
However, successful elderberry plant care involves more than planting a shrub and watering it occasionally. Poor drainage, drought stress, unsuitable varieties, and incorrect pruning can limit growth and reduce berry production.
Another important consideration is fruit safety. Raw or unripe elderberries, along with certain other parts of the plant, can contain compounds that cause illness. Correct identification, proper harvesting, and appropriate preparation are essential.
This guide explains how to choose an elderberry variety, plant it correctly, manage sunlight and water, encourage flowering and fruiting, prune mature shrubs, and troubleshoot common problems. It also covers seasonal care and practical considerations for gardeners in different climates.
Quick Answer:
Elderberry plants (Sambucus species) grow best in full sun to partial shade, fertile soil, and consistent moisture with good drainage. Water young plants regularly, add compost to support healthy growth, and prune established shrubs during dormancy. Many varieties produce better fruit when a compatible second cultivar grows nearby. Choose a variety suited to your climate, allow enough space for mature growth, and harvest only correctly identified, ripe berries prepared safely.
1. Choose the Right Elderberry Variety
Before planting, identify which elderberry species and cultivar you are growing. Different varieties vary in mature size, fruit color, climate tolerance, and suitability for harvesting.


7
| Variety | Best known for | What to consider |
|---|---|---|
| American elderberry (Sambucus canadensis) | Fruit production and vigorous growth | Needs space for a spreading shrub |
| European elderberry (Sambucus nigra) | Edible fruit and ornamental cultivars | Choose a cultivar suited to your climate |
| ‘Adams’ | Productive American elderberry cultivar | Check local availability and pollination compatibility |
| ‘York’ | Large berries and productive growth | Often grown alongside another compatible cultivar |
| ‘Black Lace’ | Deep purple foliage and ornamental appeal | Fruit production may not be its main advantage |
Cultivar suitability varies by region. A variety that performs well in a cool North American garden may not thrive in a hot, humid, or subtropical climate.
USU+2
Practical tip: If your main goal is harvesting berries, purchase a named fruiting cultivar from a reputable nursery. Ask whether it needs a compatible pollination partner and whether it has been tested in your local climate.
2. How Much Sunlight Do Elderberry Plants Need?
Elderberries grow in full sun or partial shade, but full sunlight generally supports better flowering and fruit production. A site receiving around six to eight hours of direct sun is a good starting point for fruit-focused growing.

Choose the right location
- Full sun: Best for encouraging abundant flowers and berries.
- Partial shade: Suitable in many gardens, although heavy shade can reduce fruit production.
- Hot afternoon exposure: In very hot climates, some protection from extreme afternoon heat may help reduce stress.
- Good airflow: Leave enough room around the shrub to reduce overcrowding and help foliage dry after rain or irrigation.
Elderberries can become large shrubs, so avoid squeezing them between buildings or planting them where mature branches will block pathways.
Expert tip: If an elderberry grows vigorously but produces few berries, check sunlight and pollination before increasing fertilizer. Extra nitrogen cannot compensate for poor light or a lack of compatible pollen.
Image suggestion: A 16:9 comparison showing a fruiting elderberry in full sun beside a leafy but sparsely flowering plant in deep shade.
3. The Best Soil for Elderberry Plants
Elderberries prefer fertile soil that retains moisture without remaining waterlogged. Soil with good drainage and plenty of organic matter supports root growth, healthy foliage, and reliable fruit production.
A slightly acidic soil is often suitable, although some elderberries tolerate a wider range of soil conditions. A pH around 5.5–6.5 is a useful starting point for many cultivated varieties.
How to prepare the planting site
- Remove persistent weeds before planting.
- Loosen the soil across the planting area.
- Mix in mature compost if the soil is low in organic matter.
- Check drainage after watering or rainfall.
- If water regularly collects in the planting area, consider a raised bed or raised planting mound.
Avoid filling the planting hole with a dramatically different soil mixture from the surrounding ground. A sharp difference in texture can affect how water moves through the root zone.
Can elderberries grow in clay soil?
They can grow in some clay soils, but dense clay that remains saturated is a serious concern. Improve the planting site, choose a better-drained location, or use a raised bed if waterlogging is persistent.
Can elderberries grow in sandy soil?
Yes, provided moisture is managed carefully. Sandy soil drains quickly and may require additional compost and more frequent irrigation during dry periods.
Image suggestion: A labeled soil infographic comparing fertile, well-drained elderberry soil with compacted, waterlogged soil.
4. How to Plant an Elderberry Bush Correctly
Planting correctly helps establish roots before the shrub faces heat, drought, or other environmental stress.

Step-by-step planting instructions
- Choose the planting season. Early spring is often suitable in regions with cold winters. In warmer climates, choose a mild period that allows roots to establish before severe heat.
- Prepare the hole. Make it about twice as wide as the root ball and no deeper than necessary.
- Position the shrub. Set the root ball at the same depth it grew in its nursery container.
- Backfill the hole. Use the excavated soil, incorporating compost across the planting area if needed.
- Water thoroughly. Moisten the root ball and surrounding soil to settle the soil around the roots.
- Apply mulch. Spread a layer of organic mulch over the root zone, keeping it away from direct contact with the stems.
- Monitor establishment. Check soil moisture frequently during the first growing season.
How much space does an elderberry need?
Spacing depends on the cultivar and how you intend to grow it. Some varieties spread several feet in every direction, while larger shrubs can become considerably wider. Check the mature dimensions on the plant label and allow sufficient room for harvesting and pruning.
Common mistake: Planting elderberries too close together because the young shrubs look small. Their vigorous growth can quickly create a crowded thicket that is harder to maintain and harvest.
5. How Often Should You Water Elderberry Plants?
Elderberries need consistent moisture, especially while establishing and while flowers and berries are developing. Although established shrubs can tolerate some dry periods, drought stress may reduce fruit development and quality.
A practical watering guide
| Plant stage or condition | Watering approach |
|---|---|
| Newly planted shrub | Keep the root zone evenly moist while roots establish |
| Active spring growth | Check soil regularly and water during dry periods |
| Flowering and fruit development | Avoid prolonged dryness; water when rainfall is insufficient |
| Hot, dry weather | Inspect soil more frequently and adjust irrigation as needed |
| Cool or rainy weather | Reduce irrigation when the soil is already moist |
| Established shrub after harvest | Water during prolonged dry spells, particularly if the soil dries deeply |
As a general reference, some production guidance recommends about one inch of water per week during the flowering-to-harvest period, including rainfall. Actual needs vary with soil, temperature, plant size, and drainage.
How to water elderberries properly
- Apply water slowly around the root zone.
- Water deeply enough to moisten the active roots.
- Avoid frequent, shallow sprinkling that wets only the soil surface.
- Use mulch to reduce evaporation and weed competition.
- Check the soil before watering again.
Practical observation: A shrub may look healthy in the morning but wilt during a hot afternoon. Check the soil before adding water. If the root zone is already wet, heat stress or root damage may be contributing to the symptoms.
Image suggestion: A four-step watering infographic showing soil inspection, deep watering, mulching, and checking moisture during fruit development.
6. How to Fertilize Elderberry Plants for Healthy Growth
Elderberries grow vigorously when they receive adequate nutrients, but more fertilizer does not always mean more berries. Excessive nitrogen can encourage leafy shoots at the expense of balanced flowering and fruit production.
What fertilizer should you use?
Start with healthy soil and finished compost. If the shrub shows weak growth or a soil test indicates a deficiency, use an appropriate fertilizer according to its label and your soil conditions.
- Newly planted shrubs: Focus on root establishment, moisture, and soil preparation. Avoid heavy fertilizer applications at planting.
- Established shrubs: Apply compost or fertilizer when needed to support spring growth.
- Fruit-producing shrubs: Use soil-test results and plant vigor to guide nutrient applications.
- Overfertilized shrubs: Stop additional feeding until you understand the cause of excessive growth.
University of Florida IFAS recommends tailoring fertility management to soil conditions and production goals. Nutrient needs also vary with the soil type and growing climate.
Signs your elderberry may need attention
| Symptom | Possible explanation |
|---|---|
| Weak or slow growth | Poor light, nutrient deficiency, or root problems |
| Pale or yellow leaves | Nutrient issues, water stress, or unsuitable soil conditions |
| Excessive leafy growth | Too much nitrogen or overly vigorous growth |
| Poor fruit production | Insufficient sunlight, pollination problems, drought, or unsuitable pruning |
These symptoms are not definitive diagnoses. Check soil moisture, drainage, light, and plant age before applying fertilizer.
Expert tip: A soil test is usually more useful than repeatedly trying different fertilizers. It can help identify nutrient deficiencies and unsuitable pH before you spend money on amendments.
7. How to Prune Elderberry Plants for Better Fruit Production
Pruning keeps elderberries manageable, improves airflow, and encourages productive new growth. Without maintenance, older shrubs can develop dense, tangled stems that make harvesting difficult.


When should you prune elderberries?
For many temperate-climate varieties, late winter or early spring is suitable, before new growth begins. Timing may differ in warmer climates where plants have a different growth cycle.
How to prune an established shrub
- Remove dead, broken, diseased, or badly damaged stems.
- Cut out weak or overcrowded growth.
- Remove older, less productive canes as appropriate for the variety.
- Retain healthy young and middle-aged canes.
- Remove unwanted suckers if you need to control the shrub’s spread.
Many fruit-growing guides recommend removing older canes because productivity often declines as they age. However, pruning systems differ: some growers maintain a mixture of cane ages, while others cut the entire shrub back periodically for particular production goals.
Should you cut elderberries to the ground?
Not necessarily. Cutting all canes to ground level can simplify management, but it may reduce the next harvest because the new shoots need time to develop productive growth.
For a home garden, selective pruning is usually a sensible starting point. It allows you to remove old wood while retaining healthy canes for continued production.
Practical tip: Mark particularly vigorous young canes during the growing season. This makes it easier to distinguish newer growth from older stems during winter pruning.
Image suggestion: A before-and-after pruning infographic showing an overcrowded elderberry shrub and a more open shrub with a healthy mix of young and mature canes.
8. How to Encourage Elderberry Flowers and Berries
A healthy elderberry shrub does not always produce a large harvest immediately. Plants need time to establish, and fruit production depends on several conditions working together.

Why your elderberry may not produce fruit
Insufficient sunlight: Heavy shade can reduce flowering. Move a young plant if practical, or improve its exposure by managing nearby vegetation.
Poor pollination: Some cultivars set fruit more reliably when another compatible cultivar flowers nearby.
Drought stress: Dry conditions during flowering and fruit development may cause flowers or immature fruit to drop.
Excessive pruning: Removing the wrong stems at the wrong time can reduce flowering and fruiting.
Plant immaturity: Young shrubs may need a few growing seasons to establish before producing substantial harvests.
Do you need two elderberry plants?
Planting two compatible cultivars is a good strategy for many fruit-producing elderberries. Some varieties are partly self-fruitful, but cross-pollination can improve fruit set and yield. Choose cultivars whose flowering periods overlap.
What if your elderberry grows leaves but no berries?
Work through this checklist before changing your care routine:
- Does the shrub receive enough direct sunlight?
- Is it old enough to produce fruit?
- Does the cultivar need a pollination partner?
- Was it pruned heavily before flowering?
- Did drought or unusually hot weather affect flowering?
- Are the flowers developing normally?
This approach helps you identify the likely cause instead of adding unnecessary fertilizer or pruning more aggressively.
Image suggestion: A split image comparing a vigorous elderberry with abundant fruit clusters and a leafy shrub with few berries, accompanied by sunlight, pollination, and water icons.
9. Growing Elderberries in Pots
Elderberries are generally easier to manage in the ground because many varieties grow into large, spreading shrubs. However, a compact cultivar can be grown in a large container if its roots receive adequate space and moisture.

Container-growing essentials
- Choose a suitable cultivar: Look for a compact variety with a mature size appropriate for your space.
- Use a large pot: A substantial container gives the roots more room and reduces how quickly the soil dries.
- Ensure drainage: The pot must have unobstructed drainage holes.
- Use quality potting mix: Choose a fertile, well-draining mix rather than heavy garden soil alone.
- Monitor moisture closely: Container plants can dry rapidly during hot or windy weather.
- Feed carefully: Use a suitable fertilizer at the recommended rate, avoiding repeated heavy applications.
Can an elderberry fruit in a pot?
Yes, it is possible, but success depends on the variety, container size, pollination, sunlight, and overall care. A plant that outgrows its container may become difficult to water consistently and produce less vigorous growth.
If berries are your main goal, growing a suitable variety in the ground is usually simpler when space and climate permit.
10. Seasonal Elderberry Plant Care Calendar
Elderberry care should follow the plant’s growth cycle rather than a rigid monthly schedule. The calendar below is most relevant to regions with distinct spring, summer, autumn, and winter seasons.

Spring: Establish growth
- Plant new shrubs when conditions are suitable.
- Apply compost or fertilizer if needed.
- Complete dormant-season pruning before active growth.
- Check mulch and monitor soil moisture.

Summer: Protect flowers and fruit
- Water during dry periods.
- Monitor pests and leaf diseases.
- Keep weeds under control.
- Check that fruiting plants receive adequate light and moisture.

Late summer and autumn: Harvest
- Harvest only correctly identified, ripe berries.
- Remove damaged fruit and fallen debris.
- Maintain moisture during prolonged dry weather.
- Avoid unnecessary late-season fertilizer that encourages tender growth.

Winter: Maintain structure
- Prune during dormancy where appropriate.
- Remove dead or diseased stems.
- Protect young plants if the variety needs it.
- Plan replacement or additional cultivars if pollination is poor.
In warmer regions, the timing of dormancy, flowering, and harvesting may differ. Observe local growing conditions and cultivar guidance rather than applying a northern-climate calendar unchanged.
11. Common Elderberry Pests and Diseases
Elderberries are vigorous plants, but they can still suffer from insect pests, fungal diseases, and environmental stress. Regular inspection is often the easiest way to catch problems before they become severe.


| Problem | What to look for | First response |
|---|---|---|
| Aphids | Clusters of small insects on tender shoots | Remove small infestations with a gentle water spray |
| Borers | Stem damage, holes, or weakening branches | Prune affected material where appropriate and identify the pest |
| Powdery mildew | White, powder-like growth on leaves | Improve airflow and remove severely affected material |
| Leaf spot | Dark or irregular spots on foliage | Remove fallen leaves and avoid prolonged leaf wetness |
| Cankers | Sunken or damaged areas on stems | Prune affected wood with clean tools |
| Root stress | Yellowing, wilting, or declining growth | Check drainage and soil moisture |
These problems are documented in horticultural guidance for elderberries. The exact pest and disease risks vary by region.
How to prevent problems
- Give each shrub enough room to grow.
- Remove dead, diseased, and fallen plant material.
- Water at soil level when practical.
- Avoid unnecessary fertilizer applications.
- Clean pruning tools between plants when disease is suspected.
- Identify the problem before applying a pesticide or fungicide.
Use plant-protection products only when appropriate for the identified pest or disease, and follow all label instructions. Do not assume every yellow leaf or brown spot requires chemical treatment.
12. How to Propagate Elderberry Plants
Propagating elderberries lets you grow additional shrubs from an established plant. Stem cuttings are a common method, although success depends on the species, cutting maturity, and growing conditions.

Propagation from dormant hardwood cuttings
Dormant hardwood cuttings are commonly used for many cultivated elderberries.
- Select healthy, mature stems from a suitable parent plant during dormancy.
- Cut sections of firm stem with several buds.
- Keep track of which end is the base so the cutting is planted upright.
- Insert the basal end into a suitable, moist propagation medium.
- Place the cutting in a protected location with appropriate light and temperature.
- Keep the medium moist but not waterlogged.
- Transplant the rooted cutting once it has developed a healthy root system and can tolerate the conditions in its permanent location.
Can elderberries grow from seed?
Yes, but seed-grown plants may take longer to mature and may not retain the desirable characteristics of the parent cultivar. Seeds can also require specific pretreatment or stratification to germinate successfully.
For gardeners who want a particular fruiting cultivar, a correctly identified cutting or nursery-grown plant is generally the more predictable choice.
Image suggestion: A step-by-step propagation infographic showing hardwood cuttings, planting in propagation mix, root development, and transplanting.
13. Harvesting Elderberries Safely
Elderberry care does not end when the berries appear. Correct identification, ripeness, and preparation are essential before using the fruit.

When are elderberries ready to harvest?
Depending on the species and cultivar, ripe berries are commonly dark purple, blue-black, or nearly black. Harvesting time varies by climate and variety.
Look for clusters with berries that have reached their mature color. Do not rely on color alone if you are uncertain about the plant’s identity.
Important elderberry safety precautions
- Never eat unidentified wild berries. Confirm the species before harvesting.
- Avoid raw or unripe elderberries. They may contain compounds that cause nausea, vomiting, or other illness.
- Do not consume leaves, stems, or other plant parts as food. Some elderberry parts contain potentially harmful compounds.
- Remove unripe or damaged berries. Sort clusters carefully before preparation.
- Cook berries thoroughly before eating. Use a reliable preparation method intended for edible elderberries.
The University of Maryland Extension advises cooking elderberries before consumption. Some elderberry species, especially those with red fruit, require particular caution.
If someone develops severe symptoms after eating elderberries or another unidentified plant, contact local emergency services or a poison information service promptly.
14. Common Elderberry Plant Care Mistakes to Avoid
A few avoidable mistakes can reduce the health and productivity of an otherwise vigorous elderberry shrub.
- Planting in deep shade: This can limit flowering and fruit production.
- Letting young plants dry out: Establishing shrubs need regular moisture while roots develop.
- Allowing waterlogged soil: Persistently saturated roots can become damaged.
- Using excessive nitrogen fertilizer: Vigorous leafy growth does not guarantee more berries.
- Pruning every cane indiscriminately: Removing too much productive wood can reduce the harvest.
- Planting only one cultivar without checking pollination needs: Some varieties produce better crops with a compatible partner.
- Ignoring mature size: Crowded shrubs become harder to prune, inspect, and harvest.
- Eating raw or unripe berries: Correct preparation is essential for safety.
A productive elderberry shrub usually benefits more from consistent care than from frequent intervention. Start with the right variety, a suitable planting site, and reliable moisture. Then adjust pruning and feeding according to how the plant actually grows.
15. Frequently Asked Questions About Elderberry Plant Care
How much sun does an elderberry plant need?
Elderberries generally grow and fruit best in full sun, often around six to eight hours of direct sunlight. They tolerate partial shade, but heavier shade may reduce berry production.
How often should I water an elderberry plant?
Water regularly while the plant establishes. Once established, water during dry periods, paying particular attention to flowering and fruit development. Check soil moisture and rainfall instead of following a fixed daily schedule.
What is the best fertilizer for elderberries?
Finished compost and a suitable complete fertilizer can support growth. Use a soil test and the plant’s vigor to guide feeding, and avoid excessive nitrogen.
Do elderberries need two plants to produce fruit?
Not every cultivar has the same pollination requirements. Many elderberries are partly self-fruitful, but growing two compatible cultivars with overlapping bloom times can improve fruit set and yields.
How long does an elderberry plant take to produce fruit?
Some plants begin producing fruit within their first few years, but the timing depends on the cultivar, plant age, growing conditions, and establishment. A substantial harvest often takes longer than the first few flowers.
When should I prune elderberry bushes?
For many cultivars in temperate climates, late winter or early spring before new growth begins is suitable. Remove dead, damaged, and diseased wood, and manage older canes according to your cultivar and pruning system.
Can elderberries grow in pots?
Yes, particularly compact varieties, but containers must be large enough to support the mature plant. Good drainage, consistent moisture, and careful feeding are essential.
Why is my elderberry growing but not producing berries?
Possible causes include insufficient sunlight, an immature plant, poor pollination, drought stress, or pruning at the wrong time. Check these conditions before applying extra fertilizer.
Are elderberries easy to grow?
They can be relatively easy to grow once established. Their main requirements are a suitable climate, adequate sunlight, moisture, good drainage, and occasional pruning.
Can elderberries grow in hot climates?
Some elderberry species and cultivars tolerate warm conditions, but suitability depends on the variety and local climate. In hot regions, choose locally adapted planting material, monitor moisture, and protect plants from severe heat stress when necessary.
Can I eat elderberries straight from the bush?
Do not eat raw or unripe elderberries. Correctly identified edible elderberries should be sorted and thoroughly cooked before consumption. Avoid eating the leaves and stems.
Conclusion: Grow Healthier Elderberry Plants With the Right Care
Successful elderberry plant care begins with choosing a suitable variety and planting it in a sunny location with fertile, well-drained soil. Keep young plants consistently moist, use fertilizer thoughtfully, and prune established shrubs to maintain healthy, productive growth.
If berries are your goal, consider growing compatible cultivars together and pay close attention to sunlight, pollination, and moisture during flowering and fruit development.
Most importantly, identify elderberries correctly and prepare their fruit safely before eating it. With these practical steps, you can grow a vigorous shrub that adds attractive flowers, useful fruit, and wildlife value to your garden.