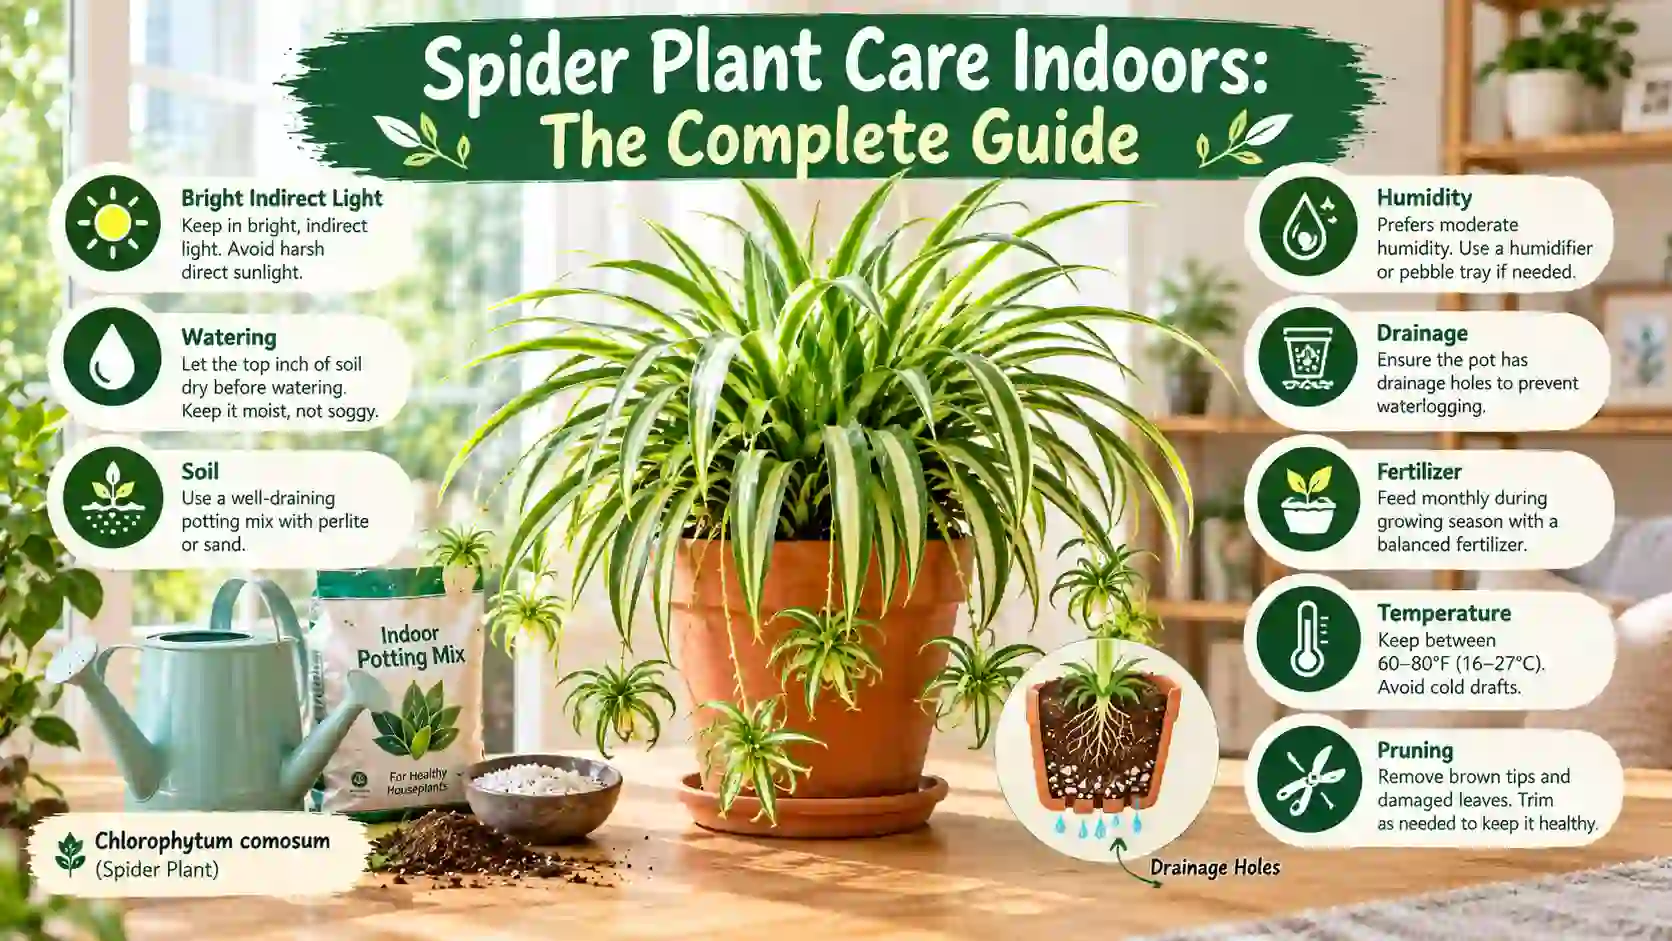
Spider plants (Chlorophytum comosum) thrive indoors with bright, indirect light, weekly watering (letting soil dry out between waterings), and temperatures between 65–90°F (18–32°C). They’re forgiving of neglect, tolerate low humidity, and rarely need fertilizer more than once a month during spring and summer. Brown leaf tips usually signal fluoride-heavy tap water or dry air rather than a serious problem — switch to filtered or distilled water and most issues resolve within a few weeks.
Why Spider Plants Are the Plant Most Beginners Get Wrong (In a Good Way)
Spider plants have a reputation as “impossible to kill,” and that reputation causes more problems than it solves. New plant owners assume the plant needs almost no attention, then either drown it in water out of guilt or ignore it until it’s crispy and stressed. The truth sits in the middle: spider plants are resilient, but resilient isn’t the same as indestructible.
What actually makes spider plants beginner-friendly is that they show you what’s wrong before it becomes fatal. Yellowing leaves, brown tips, and pale foliage are all early warning signs — the plant is communicating, not failing. Once you learn to read those signals, spider plant care becomes almost effortless.
This guide covers what the plant actually needs, why each factor matters, and how to fix the problems that come up most often — based on how the plant behaves in real homes, not just in ideal greenhouse conditions.
Image Suggestion: A healthy spider plant with arched, variegated leaves and visible “spiderettes” (baby plantlets) hanging from a runner.
Light Requirements: What “Bright Indirect Light” Actually Means
Spider plants tolerate a wide range of light, which is exactly why so many owners get this wrong — the plant survives in poor light, it just doesn’t thrive.
- Ideal: Bright, indirect light — a few feet back from an east or west-facing window, or a north-facing window with an unobstructed view of the sky.
- Tolerable: Low to medium light, though growth slows and variegation (the white or yellow striping) can fade to solid green.
- Avoid: Direct, intense afternoon sun, which scorches leaves — you’ll see bleached, papery patches rather than a gradual burn.
A common mistake is placing spider plants in a dim corner because they’re “supposed to handle low light.” They handle it — they don’t prefer it. A plant that’s technically alive but hasn’t produced a new leaf in three months is usually light-starved, not diseased.
Practical tip: If your spider plant’s variegated leaves are reverting to plain green, that’s a light signal, not a genetic mutation. More brightness (still indirect) usually restores the pattern in new growth.
Watering: The Single Biggest Cause of Spider Plant Problems
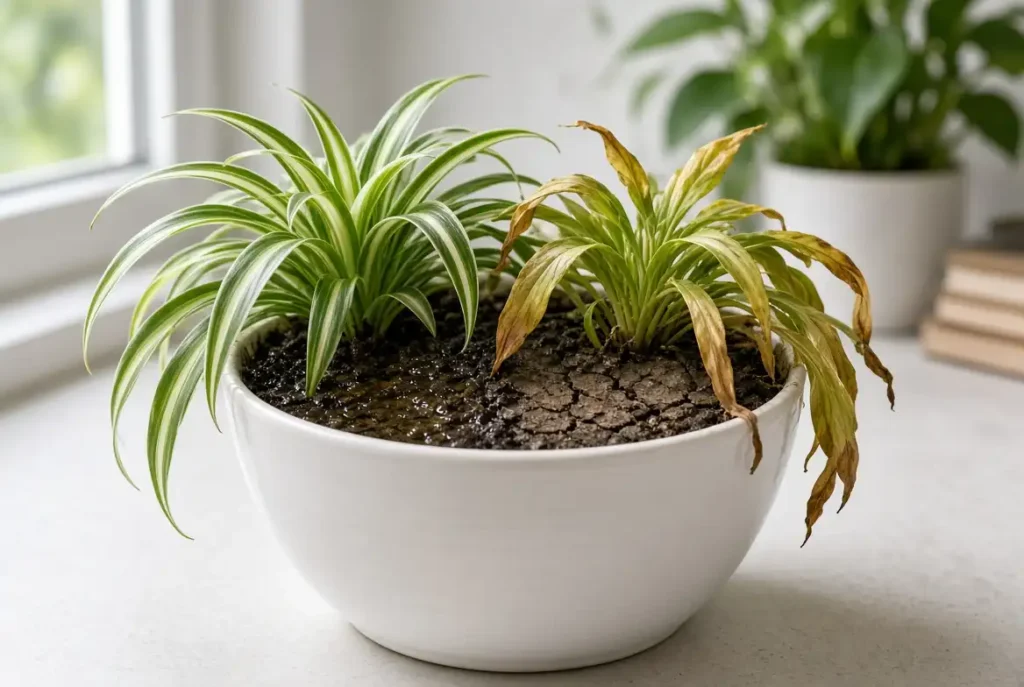
Overwatering — not underwatering — is responsible for most spider plant deaths. The plant stores water in thick, tuberous roots, which means it’s built for drought, not for consistently soggy soil.
How to water correctly:
- Check the top 1–2 inches of soil with your finger before watering.
- Water thoroughly only when that layer feels dry, letting water run through the drainage holes.
- Empty any standing water from the saucer within 15–20 minutes.
- Reduce frequency in fall and winter, when the plant’s growth slows.
In most homes, this works out to watering every 7–10 days in summer and every 2–3 weeks in winter — but soil dryness, not a calendar, should always be the deciding factor. Pot size, material (terracotta dries faster than plastic), and room temperature all shift the timeline.
Common mistake: Watering on a fixed schedule regardless of soil condition. A plant in a small plastic pot in a humid bathroom dries out far slower than the same plant in a large terracotta pot near a heating vent.
Why Brown Leaf Tips Happen (And Why They’re Rarely Serious)
This is the single most-asked question about spider plants, and the answer surprises most people: brown tips are almost never a sign of a dying plant. They’re typically caused by one or more of the following:
| Cause | Why It Happens | Fix |
|---|---|---|
| Fluoride/chlorine in tap water | Spider plants are unusually sensitive to fluoride buildup in soil | Switch to filtered, distilled, or rainwater |
| Low humidity | Dry indoor air (especially in winter with heating) stresses leaf tips | Group plants together, use a pebble tray, or run a humidifier |
| Fertilizer buildup | Excess salts accumulate in soil over time | Flush soil with plain water every few months; use half-strength fertilizer |
| Underwatering | Roots dry out completely between waterings | Water more consistently, check soil more often |
You do not need to cut every brown tip off for the plant’s health — it’s cosmetic. If you want a tidier appearance, trim just the brown portion with clean scissors at an angle, leaving the healthy green tissue intact.
Image Suggestion: Close-up comparison of a spider plant leaf with fluoride-related tip burn next to a healthy, unaffected leaf.
Soil and Potting: Getting the Foundation Right
Spider plants aren’t picky about soil type, but drainage is non-negotiable given how easily their roots rot in standing water.
- Best mix: A standard well-draining potting mix, ideally with added perlite for extra aeration.
- Pot choice: Always choose a pot with drainage holes. Terracotta is a good choice for anyone prone to overwatering, since it wicks moisture away faster than plastic or glazed ceramic.
- Repotting: Spider plants are vigorous growers and often become rootbound within a year. Signs include roots circling the pot’s surface, water running straight through without absorbing, and slowed growth. Repot in spring into a container roughly 1–2 inches larger in diameter.
Expert insight: A slightly rootbound spider plant actually produces more “spiderettes” (baby plantlets on runners) than one in a spacious pot, since mild root stress triggers reproductive growth. If you’re propagating for new plants, don’t rush to repot the moment it looks snug.
Temperature and Humidity
Spider plants are native to tropical and subtropical regions of South Africa, but they’ve adapted well to typical indoor conditions.
- Ideal temperature range: 65–90°F (18–32°C)
- Minimum tolerance: Above 50°F (10°C) — anything colder risks cold damage or death
- Humidity: Adaptable, but brown tips become more frequent below 40% humidity, common in winter with indoor heating
Avoid placing spider plants near cold drafts (doors, single-pane windows in winter) or right next to heating vents, both of which cause rapid, localized stress that’s harder to diagnose than a general care issue.
Fertilizing: Less Is More
Spider plants are light feeders. Over-fertilizing is a more common problem than under-fertilizing, and it directly causes the brown-tip issue covered above.
- Feed with a balanced, water-soluble houseplant fertilizer diluted to half strength.
- Apply once a month during spring and summer (active growth).
- Skip fertilizing entirely in fall and winter, when the plant is semi-dormant and can’t use the extra nutrients.
Common mistake: Fertilizing more often “to help it grow faster.” This typically backfires, causing salt buildup in the soil that shows up as burned leaf tips within a few weeks.
Propagation: Turning Spiderettes Into New Plants
One of the most rewarding parts of spider plant ownership is propagation, which is simple enough for complete beginners.
- Wait until a spiderette (baby plantlet) develops small brown nubs at its base — these are aerial roots forming.
- Snip the spiderette from the runner, leaving a small stem attached.
- Place it in water or directly into moist potting mix.
- Keep in bright, indirect light; roots typically establish within 2–4 weeks in water, or you’ll see new growth in soil within a similar timeframe.
- Once established, care for it exactly as you would the parent plant.
Practical tip: Plants grown in water first, then transplanted to soil, often transition more easily than those started directly in soil, because you can visually confirm root development before the switch.
Image Suggestion: Step-by-step visual of a spiderette being cut, rooted in a glass of water, and then potted.
Common Problems and Troubleshooting
Pale or washed-out leaves: Usually too much direct sun. Move to a spot with filtered or indirect light.
Yellow leaves (not just tips): Often overwatering or poor drainage. Check that the pot drains fully and the soil isn’t staying wet for days.
No new spiderettes forming: Spider plants typically need to reach a mature size and may need slightly longer days (more light exposure) to trigger plantlet production. Patience is usually the fix, not intervention.
Wilting despite moist soil: This can indicate root rot from prolonged overwatering. Remove the plant from its pot, trim any black or mushy roots with clean scissors, and repot in fresh, dry soil.
Pest issues: Spider plants are relatively pest-resistant, but spider mites and mealybugs occasionally appear, especially in dry indoor air. Wipe leaves periodically with a damp cloth, which also helps you catch pest problems early and keeps the foliage able to photosynthesize efficiently.
Frequently Asked Questions
Are spider plants toxic to cats and dogs?
No — spider plants are non-toxic to cats and dogs according to the ASPCA. That said, cats are often strongly attracted to them (the plant has a mild hallucinogenic-like compound similar to catnip for some cats), so pet owners may want to hang plants out of reach to prevent leaf damage rather than for safety reasons.
How often should I water a spider plant?
There’s no universal number — check the soil rather than the calendar. Water when the top 1–2 inches are dry, which is typically every 7–10 days in summer and every 2–3 weeks in winter.
Why is my spider plant not producing babies (spiderettes)?
This usually comes down to maturity and light. Younger plants and those in lower light conditions often take longer to flower and produce plantlets. Increasing light exposure and patience are the most reliable fixes.
Can spider plants grow in low light?
They’ll survive, but not thrive. Expect slower growth and less vibrant variegation. For a genuinely healthy plant, bright indirect light is worth prioritizing.
Should I mist my spider plant?
Misting offers minimal humidity benefit and can promote fungal issues if water sits on leaves. A humidifier or pebble tray is more effective for combating dry air.
Conclusion
Spider plants reward attentive-but-light care far more than either strict schedules or total neglect. The plant’s real needs are simple: bright indirect light, water only when soil has dried out, occasional light feeding in growing season, and filtered water if brown tips become bothersome. Most problems that show up — brown tips, pale leaves, slow growth — are the plant communicating a minor imbalance, not signs of serious decline.
Start by observing your specific environment (light levels, humidity, water source) rather than following generic instructions rigidly, and adjust from there. Within a season, most spider plant owners find they’ve moved from anxious troubleshooting to confident, low-effort care — which is exactly the reputation this plant deserves.